How I Saved ₹95,000 in 21 Months with Solar – A Real-Life Experience for Indian Homeowners
When I first considered installing solar panels at home, I had numerous questions. Will it save money? Is it worth the investment? Like most Indian homeowners, I was skeptical. However, after just 21 months, my electricity bills had decreased significantly, allowing me to save a total of ₹95,000.
In this blog post, I’m sharing my complete journey—from installation and costs to monthly savings and lessons learned—so you can decide if solar is right for your home too.

🔍 Step 1: The Decision & Site Survey
Choosing to Go Solar — and What the Site Survey Revealed
In July 2023, we decided to go solar. We contacted the nearest solar installer, who was experienced and certified. The representative visited our house the next day. He did the site survey.
The goal was to gather all the necessary technical and practical data to design a solar system that works efficiently and safely.
Here is what is typically done in a site survey:
🧭 Location & Orientation Check:
Determine roof direction, tilt angle, and usable area for panels.
🌤️ Shadow Analysis:
Identify obstructions like trees, buildings, or tanks that may cause shading.
📏 Roof & Structure Assessment:
Inspect roof type, condition, material, slope, and strength for safe installation.
⚡ Electrical System Audit:
Check distribution board, phase type, wiring, meter type, load capacity, and inverter placement.
🧾 Energy Consumption Analysis:
Review past 6–12 months of electricity bills, usage patterns, and heavy appliance load to decide optimal system size.
📷 Photo & Video Documentation:
Capture images/videos of the roof, shadows, DB, meter, inverter location, and surroundings for accurate design.
🧮 Feasibility & Design Inputs:
Analyze all data to finalize system size, panel layout, estimated output, cost, and ROI.
🔧 Mounting & Wiring Path Planning:
Choose appropriate mounting, plan panel layout, and define wiring path for safety, efficiency, and aesthetics.
After all this, the site engineer advised us on a 5-kW grid-tied solar power system based on our energy needs.
✅ Want to check if your home is suitable for solar? Try my free Solar Snap tool to estimate sunlight at your location!
⚙️ Step 2: My Solar System Design and Cost Breakdown
What a 5 kW Grid-Tied System Looks Like – Components and Pricing
The following system design was recommended by the site engineer:
- Solar Panels: 10 x 535 watts
- Type and technology: Mono-PERC half-cut solar cell technology
- Inverter: 3-phase inverter (Polycab) with wi-fi connection and the facility of remote monitoring of the system’s performance
- Structure: Galvanized iron
- Net-Meter for bi-directional flow of energy
- Year of installation: August 2023
- Orientation: South facing
- Tilt: 20⁰ from the ground
5 kW Grid-Tied Solar System Cost Breakdown in India
Thereafter, we inquired about the total cost of the system with a breakup. Here’s the costing table of our 5-kW grid tied solar power system:
| Component | Description | Cost (INR) |
| Solar Panels (5 kW) | Mono PERC, DCR compliant | ₹1,45,000 |
| On-Grid Inverter (5 kW) | Brands: Growatt / Luminous / Delta | ₹46,000 |
| Mounting Structure | Galvanized Iron / Aluminium | ₹41,500 |
| AC Distribution Box (ACDB) | With MCBs, SPD | ₹3,500 |
| DC Distribution Box (DCDB) | With fuses and SPD | ₹3,500 |
| Array Junction Box (AJB) | Combiner Box for strings | ₹5,500 |
| Lightning Arrester | Copper-based, with accessories | ₹2,000 |
| AC Wiring | With conduit and fittings | ₹5,400 |
| DC Wiring | High-quality solar DC cable | ₹1,700 |
| Net Meter (Bi-directional) | As per DISCOM guidelines | ₹9,000 |
| Earthing Kit (3 Sets) | AC, DC, and LA earthing with chemical rods | ₹8,000 |
| Other Components | MC4 connectors, pipes, cable lugs, breakers, etc. | ₹19,000 |
| Installation & Commissioning | On-site physical work: mounting, wiring, testing | ₹20,000 |
| Installer Admin & Support Charges | DISCOM liaison, drawings, logistics, supervision | ₹21,000 |
💰 Total Estimated Cost (Before Subsidy): ₹3,30,000

*BOS: Balance of System (DC wiring, AJB, LA, connectors, etc.)
📘 Confused about system sizing and cost? Enroll in my Solar Energy Masterclass
🛠️ Step 3: Installation Process
Installation Timeline – From Panels to Net Metering Approval
The installation process started at the end of July 2023 and was completed in the mid- of August 2023. It was a bit delayed due to rain, as July-August are the monsoon months in North India.

However, the installation was completed on August 14, 2023. Thereafter, it took another 7 to 10 days to get design approval, other paperwork, and permissions, including net metering approval from the electricity board.

Finally, the system started functioning on August 22, 2023.

📉 Step 4: Electricity Bill Before and After Solar
From ₹5,000 to ₹600 – My Monthly Bill Drop Explained
Before solar, our average monthly electricity bill used to be ₹ 5,000, but after going solar, our electricity bill reduced drastically to an average of ₹ 600 per month.
We started saving an average of ₹ 4,400 per month.

⚡ Step 5: Units Generated and Savings
How Much Power Did I Generate? What Did I Save?
Starting from August 22, 2023, to May 31, 2025, making 21+ months or 650 days.
In these 650 days, our 5-kW solar power system produced a total of 11961 kWh and saved ₹ 95,688.
Let me break it down:
In 2023 (From August 22 to December 31):
- Units produced: 2.354 MWh or 2354 kWh
- Savings: ₹ 7 x 2354 kWh = ₹ 16,478

In the year 2024 (12 months):
- Units produced in 2024 (12 months): 6.598 MWh or 6598 kWh
- Savings = ₹ 8 x 6598 = ₹ 52,784
(The average grid price increased)

In 2025 (5 months, from January 1 to May 31):
- Units produced: 3.007 MWh or 3007 kWh
- Savings = ₹ 8 x 3007 = Rs. 24,056

- Total Units Produced: 11961 kWh
- Total savings: ₹ 95,688
- Total days = from Aug 21 2023 to May 31 2025 = 650 days

- Per day Savings= ₹ 95688/650 = ₹147.21
- Per month savings = ₹147.21 x 30 days = ₹4,481
- Per day unit production = 11961 kWh/650 days = 18.4 kWh/day

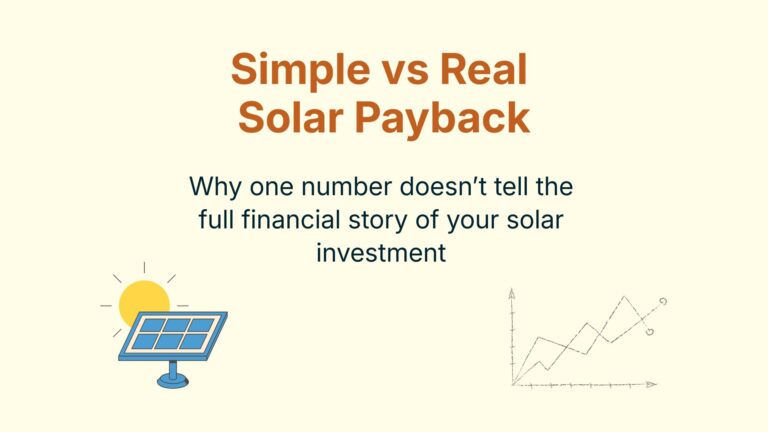
💸 Step 6: Payback Period
Payback Math: When Will I Recover My Investment?
I have taken 12 months’ savings of the year 2024, which is ₹ 52,784 or ≈ ₹ 53,000
Payback Period = Cost after subsidy/Annual savings

Our initial cost before subsidy was ₹ 3,30,000. We received the subsidy amount of ₹ 88,352 {58,352 (central government) + ₹ 30,000 (U.P. state government)} and it was credited to the bank account.
Net cost after subsidy = ₹ 3,30,000 – ₹ 88,352 = ₹ 241,648
Our annual savings in 2024 ≈ ₹ 53,000
Payback period = ₹ 2,41,648/₹ 53,000
= 4.6 years
That means that I’ll recover my solar investment in approximately 4 years and 7 months through electricity bill savings. But after considering the discounted payback using my solar feasibility spreadsheet, it is close to 5 years

📊 Curious about your payback time? My premium solar spreadsheet can calculate your exact ROI in minutes.
✅ Pros and ❌ Cons of Grid-Tied Systems
What I Love — and What You Should Know
Since I installed a grid-tied solar system, here’s what I’ve learned about its advantages and limitations:
✅ Pros of Grid-Tied Solar Systems
- Huge Savings: Offsets most of your electricity bill during the day.
- Net Metering: You get credit for surplus electricity sent to the grid.
- No Battery Needed: Lower upfront and maintenance costs.
- High Efficiency: All generated energy is either used or exported.
- Low Maintenance: No battery = fewer components to worry about.
❌ Cons of Grid-Tied Solar Systems
- No Power During Outages: Shuts off when the grid goes down.
- Policy Dependent: Net metering rules vary and can change.
- Night Usage Still Paid: Power used after sunset comes from the grid.
- Approval Delays: DISCOM approvals can be slow and confusing.
📘 Lessons I Learned from My Solar Experience
10 Powerful Insights Every Indian Homeowner Should Know
1. Solar is an Investment, Not an Expense
At first, the upfront cost seemed high. But when I saw the daily savings add up, my perspective changed. Every day my system generated electricity, it quietly put money back into my pocket. It wasn’t a cost—it was an investment that started paying off immediately.
2. Understanding Your Bill = Controlling Your Savings
Before going solar, I rarely paid attention to the details of my electricity bill. Now, I track every unit generated, every unit consumed, and every unit exported. That awareness alone has helped me become more energy-conscious and maximize my savings.
3. Choose Panels with Low Temperature Coefficient for Hot Climates
If you live in a hot climate, always look for solar panels with a low temperature coefficient (closer to -0.35%/°C). High temperatures reduce panel efficiency, so a lower temp coefficient means better performance and more savings in the long run.

4. Understand and Account for System Losses
Your solar system doesn’t deliver 100% of what the panels generate. Expect 15–20% losses due to wiring, inverter efficiency, dust, shading, and temperature effects. Always size your system slightly higher to compensate for these real-world losses.”
In my case, the losses are close to 17%, with the shading loss being the maximum due to the apartment’s location on the west side.

5. Design Matters More Than Brand
I realized that the right system size and proper panel placement are more important than just buying from a big brand. A well-designed 5 kW system can outperform a poorly designed 7 kW system. Choosing the right installer and doing proper sizing makes all the difference.
6. Shadows Can Kill Savings
Even a little shadow from a water tank, pole, or tree can drastically reduce performance. One of my strings underperformed due to morning shade. I learned the importance of shading analysis and optimal tilt angles—these aren’t optional, they’re essential.
However, in my case, there is a tall apartment building on the west side of our roof that restricts the sunlight after 5:45 pm. This makes our solar panels difficult to absorb the direct sunlight however, they still produce electricity from the diffused light available.

My observations says that we lose around 4% of the sunlight intensity daily. Otherwise, our solar panels would have performed even better.
We tried our level best to avoid the shadow of the apartment by raising the structure height without affecting its strength but there was a limit. This also raised the overall cost of the system.
7. Maintenance is Minimal but Necessary
Solar systems are low-maintenance, but not zero-maintenance. I clean my panels twice a month, and the difference in generation is noticeable. A little attention keeps performance high and extends the system’s life.

8. You Become Energy Conscious
Once I started generating my own power, I naturally began optimizing my usage. I shifted heavy appliances like washing machines and air conditioners to daytime use, when solar generation is highest. The result? Even more savings.
9. Solar = Freedom
There’s something deeply satisfying about watching your meter run backward. It means you’re not just saving money—you’re producing clean energy, reducing dependence, and taking control of your energy future.
10. Real ROI is Both Money and Mindset
Yes, I saved ₹95,000 in 650 days. But more importantly, I gained knowledge, confidence, and a more sustainable lifestyle. That’s a return on investment no calculator can show.
🪜 Step-by-Step: My Solar Installation Journey
From Consultation to Power Generation — My 8-Step Solar Process
If you’re thinking about going solar, here’s the exact installation journey I followed. It made the whole process smooth and hassle-free.
1. Initial Consultation & Site Assessment
I contacted a trusted solar consultant who visited my home, checked my roof’s condition, and reviewed my electricity usage to design the right system for me.
2. System Design & Proposal
Based on the assessment, I received a custom solar system plan tailored to my energy needs, including cost estimates and savings projections.
3. Agreement & Permits
After approving the design, the consultant handled all permissions and paperwork, including net metering approval from the electricity board.
4. Procurement & Preparation
All solar equipment was ordered, and my roof was prepared for installation.
5. Installation Day
The team installed solar panels, inverter, and wiring professionally, ensuring safety and quality.
6. Inspection & Testing
Local authorities inspected the system, and everything passed compliance checks. My system was now ready to go live.
7. System Activation & Monitoring
Once activated, I started generating solar electricity and used an app to monitor performance daily.
8. Post-Installation Support
I received ongoing support and maintenance tips to keep the system running smoothly.
🧠 Final Thoughts
Is Solar Worth It? My Honest Opinion After 21 Months
After 21 months of using solar, I’ve saved ₹95,000 and reduced my electricity bills by over 85%. It’s been low-maintenance, reliable, and totally worth the investment. If you’re thinking about going solar, I highly recommend it—just plan well and start smart.
Thinking of going solar? Try my free Solar Snap tool to get started.